The guided procedure (wizard) allows you to repair Blue&Me modules with the most suitable memory files for the version of the control unit detected. No technical knowledge is required. During the file writing procedure, the vehicle's proxy data are automatically maintained and it is also possible to choose the system language without having to change it later using a USB key.
1
Select the guided procedure in the program
Select the guided procedure from the menu on the left of the program. The wizard is automatically selected when the program is started.
2
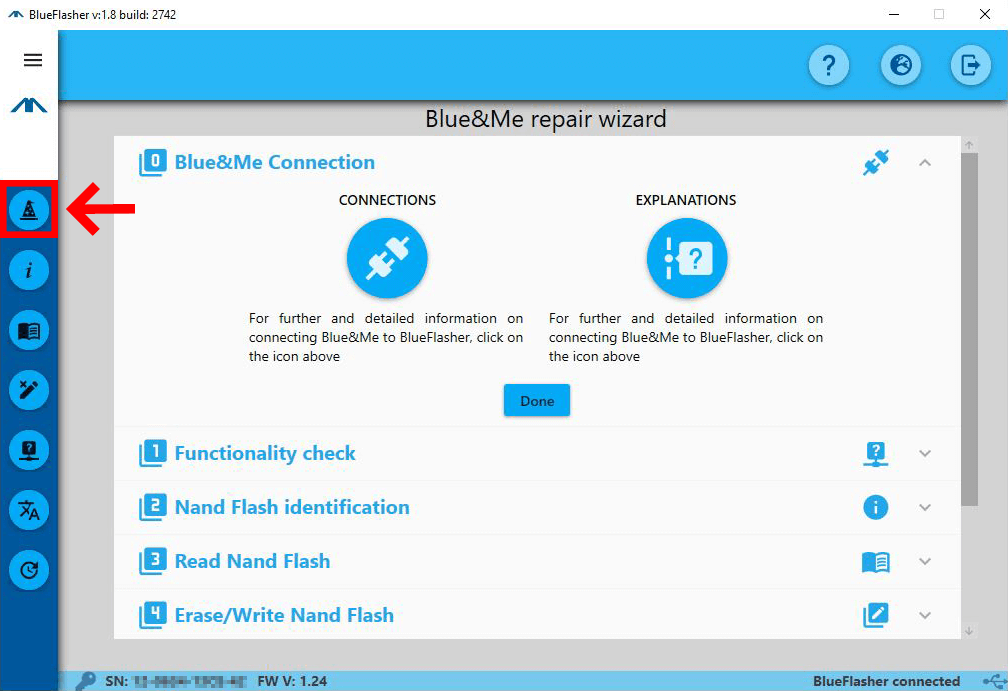
Blue&Me connection
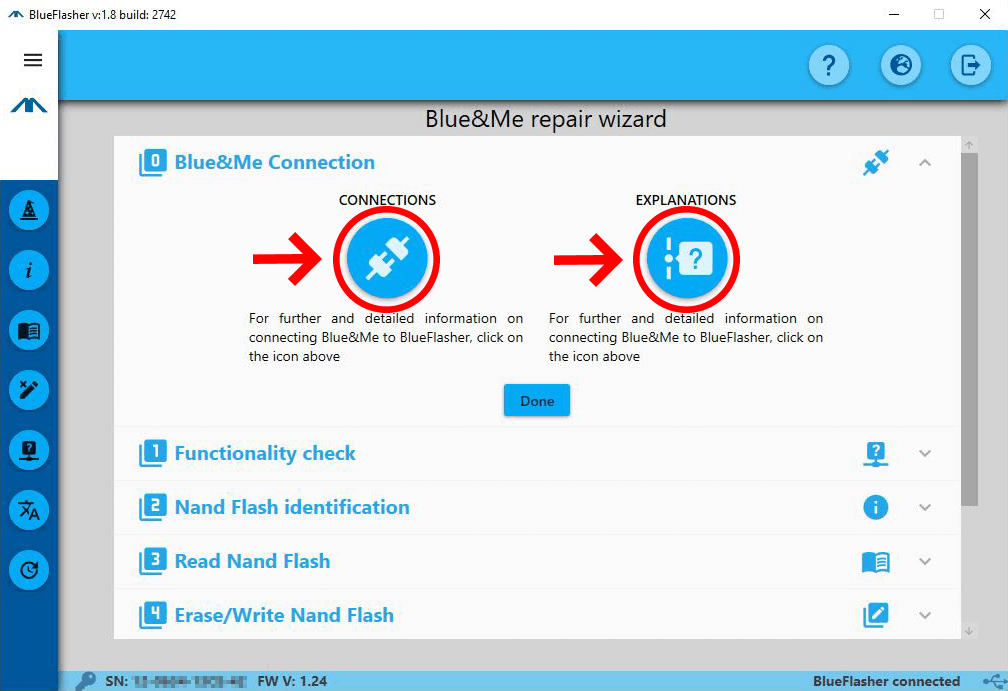
Connect the Blue&Me board to Blueflasher via connector cable and J-TAG.
If you are not sure about the connection procedure, you can always check our guide for 1st and 2nd generation control units by clicking on the "CONNECTIONS" button (Left image).
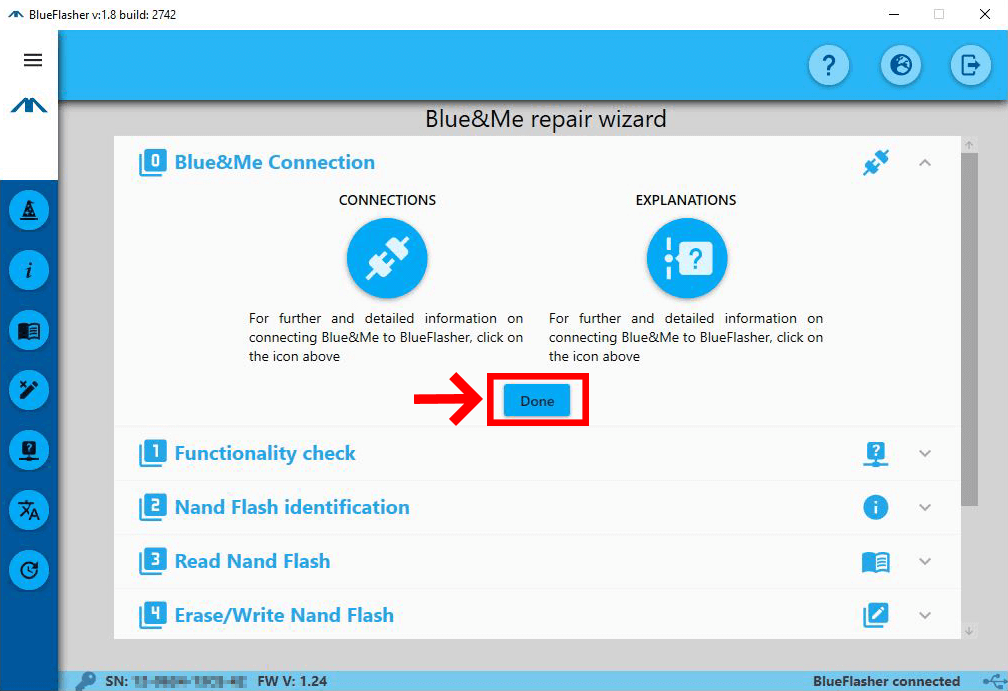
Once the connections have been made, you can proceed to the next step by pressing the "Done" button (Right image).
3
Initial functionality test
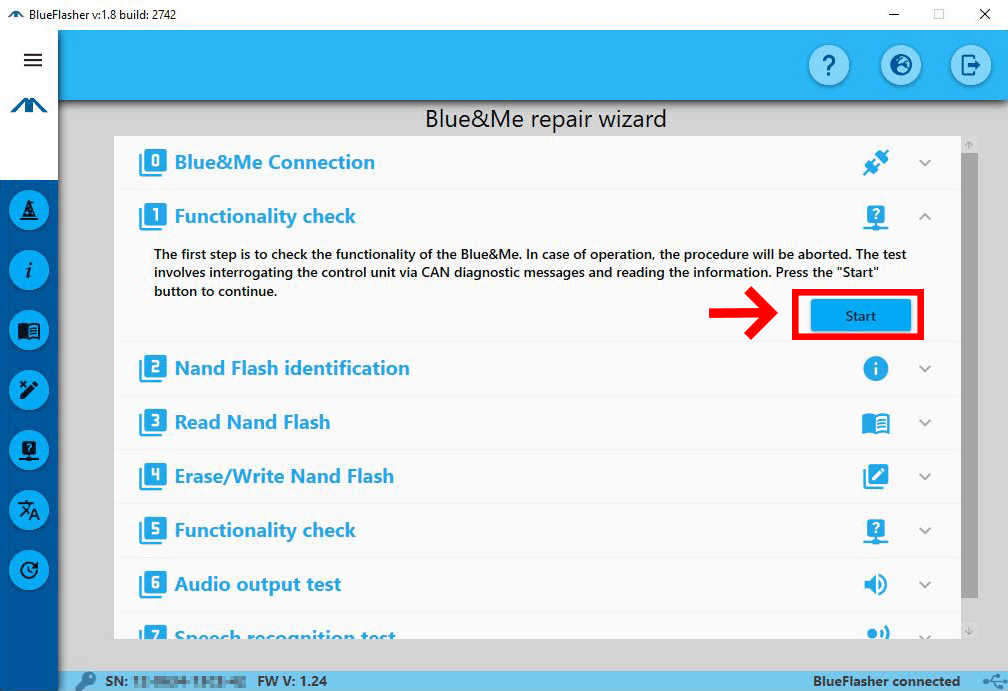
Click on the "Start" button to begin the first repair step. The functionality test checks the communication via CAN with the Blue&Me control unit.
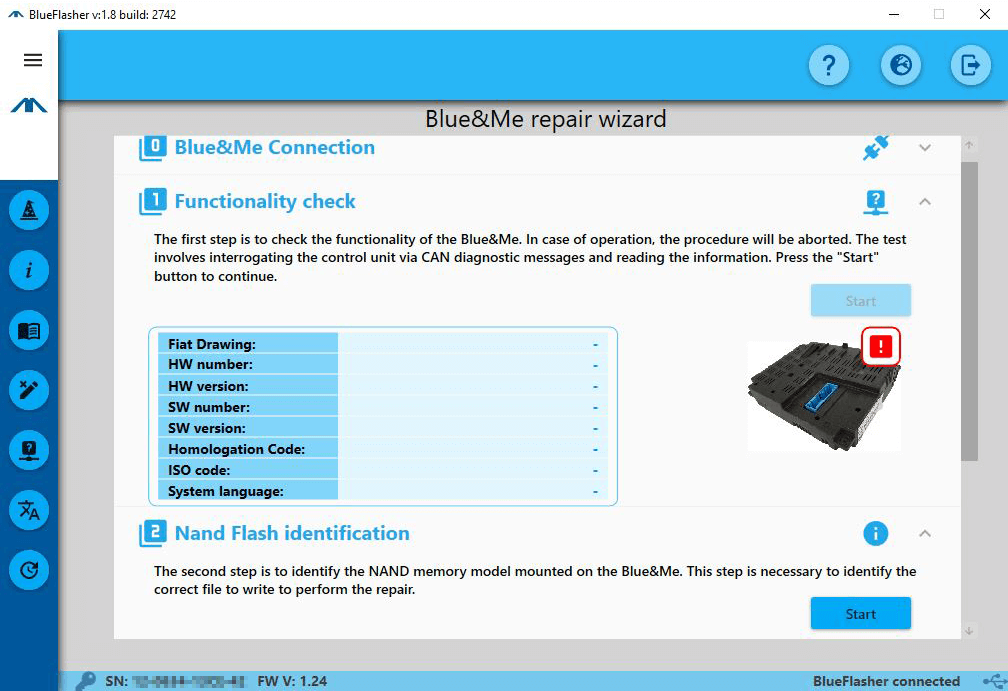
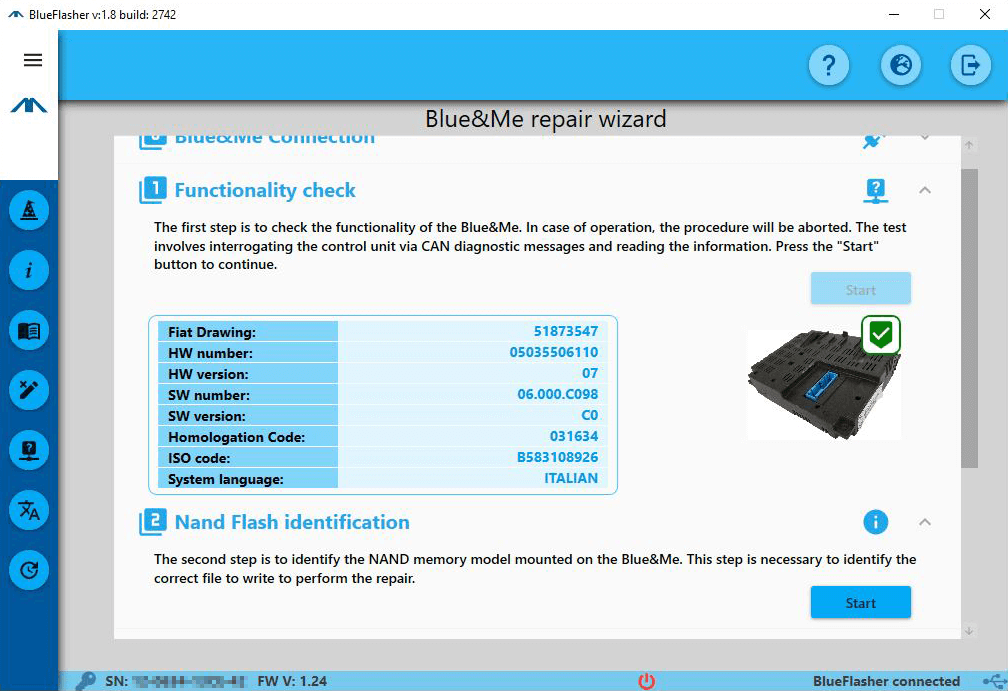
It will be possible to proceed to the next step both if the communication is not working (Left image) or working (Right image).
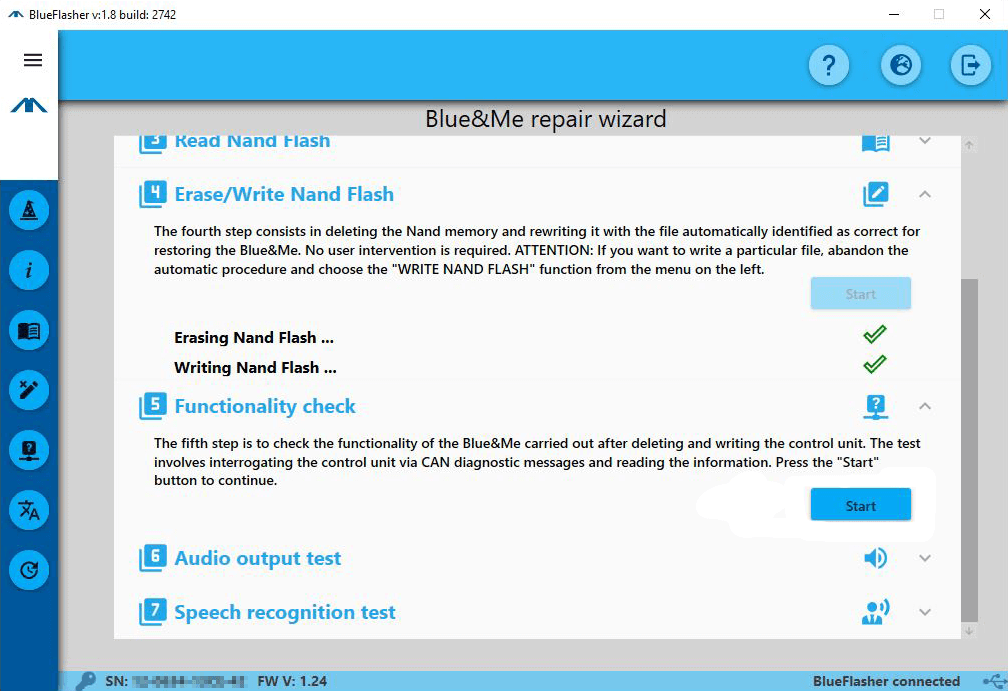
4
Blue&Me identification
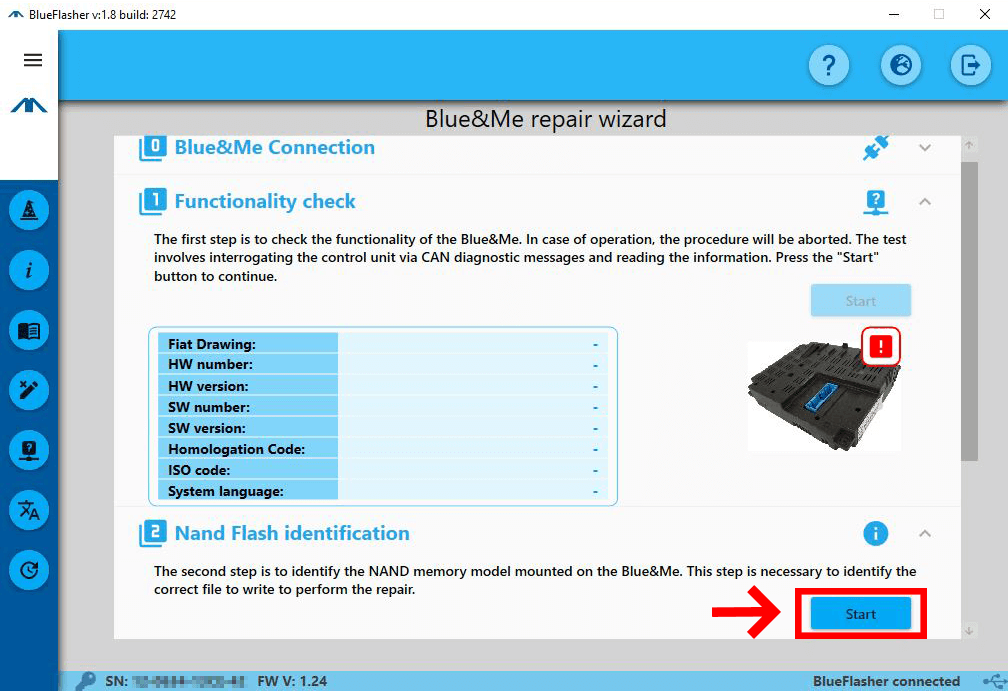
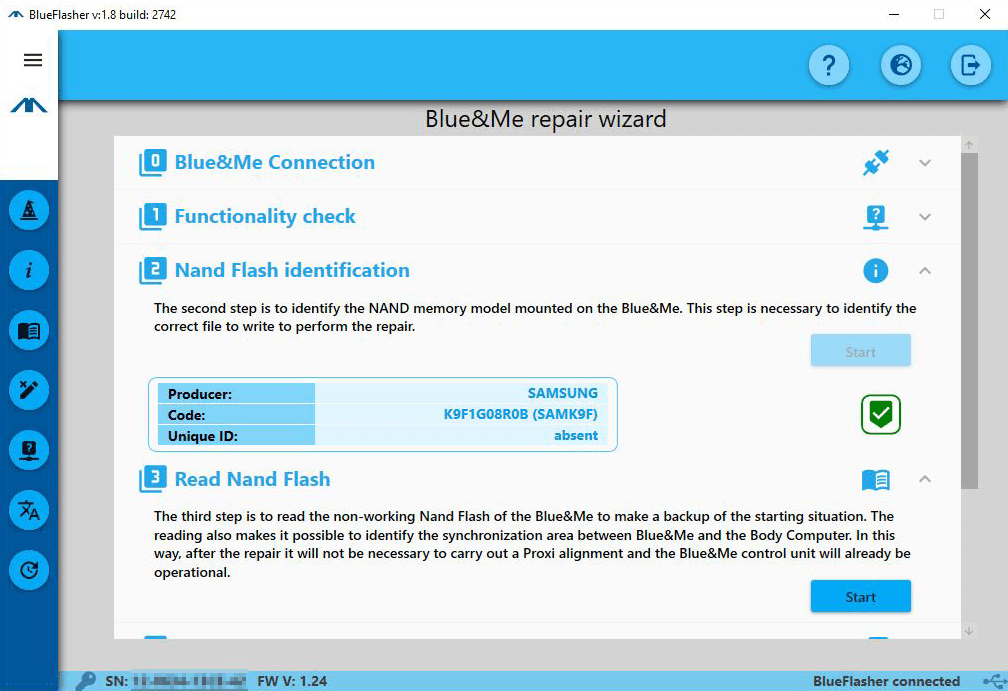
Click on the "Start" button to begin the next repair step (Left image). The function identifies the memory mounted on the connected Blue&Me and shows information such as manufacturer, model and unique ID, if present (Right image).
5
Blue&Me memory reading procedure
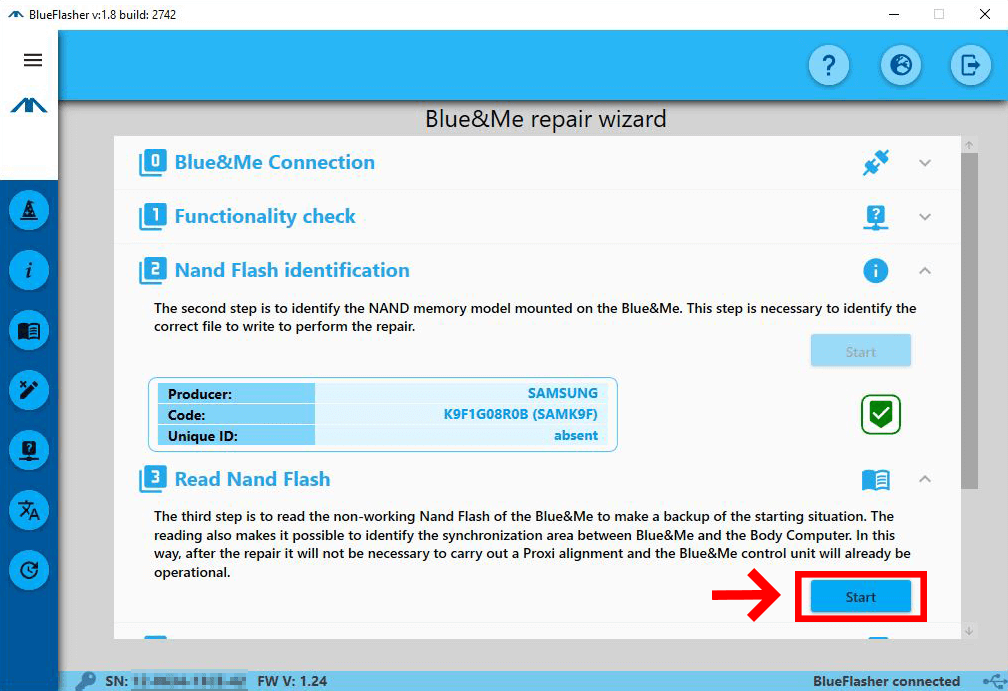
Click on the "Start" button to begin the next repair step. The reading function makes it possible to obtain a copy of the contents of the Blue&Me module memory before proceeding with the repair, in addition to obtaining the proxy data (if present).
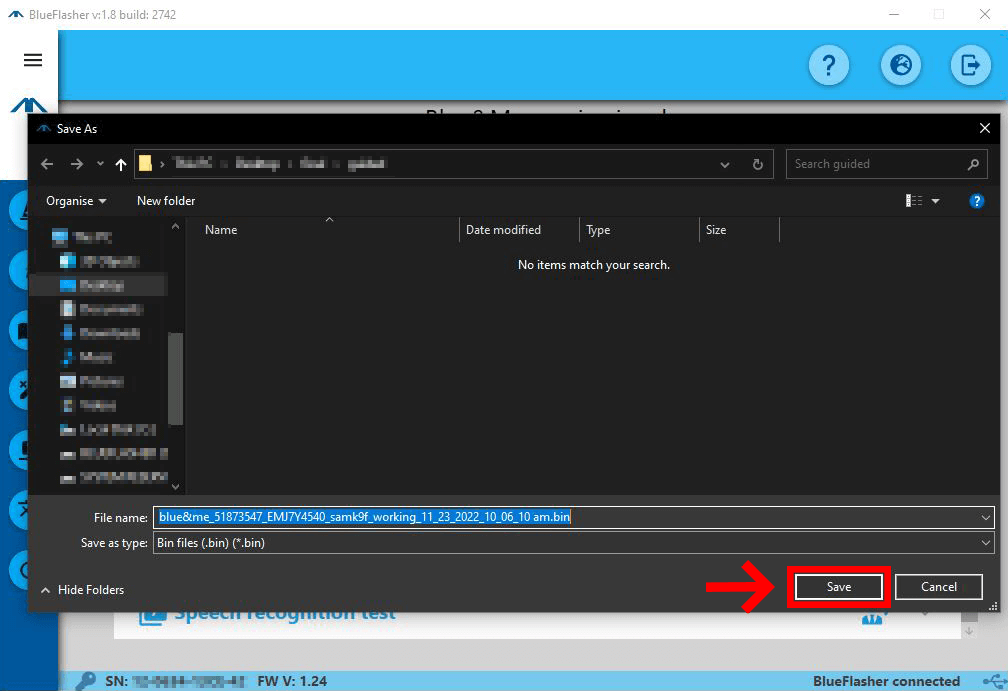

At the end of the reading procedure it will be possible to save the file on your computer wherever you prefer (Left image).
WARNING: If you decide not to save the file, it will be necessary to repeat the procedure.
Once you have saved the file the program will show the information obtained during the reading, such as FIAT drawing and software version, system language and presence or absence of proxy data (Right image).
6
Repair file writing procedure
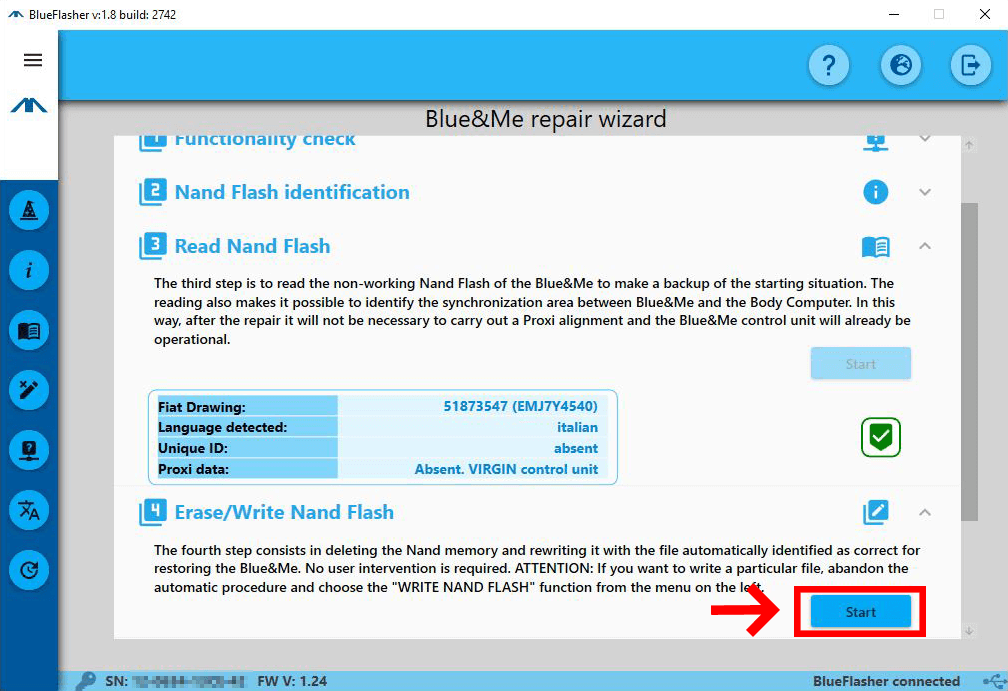
Click on the "Start" button to begin the next repair step. This will open a prompt for the user:
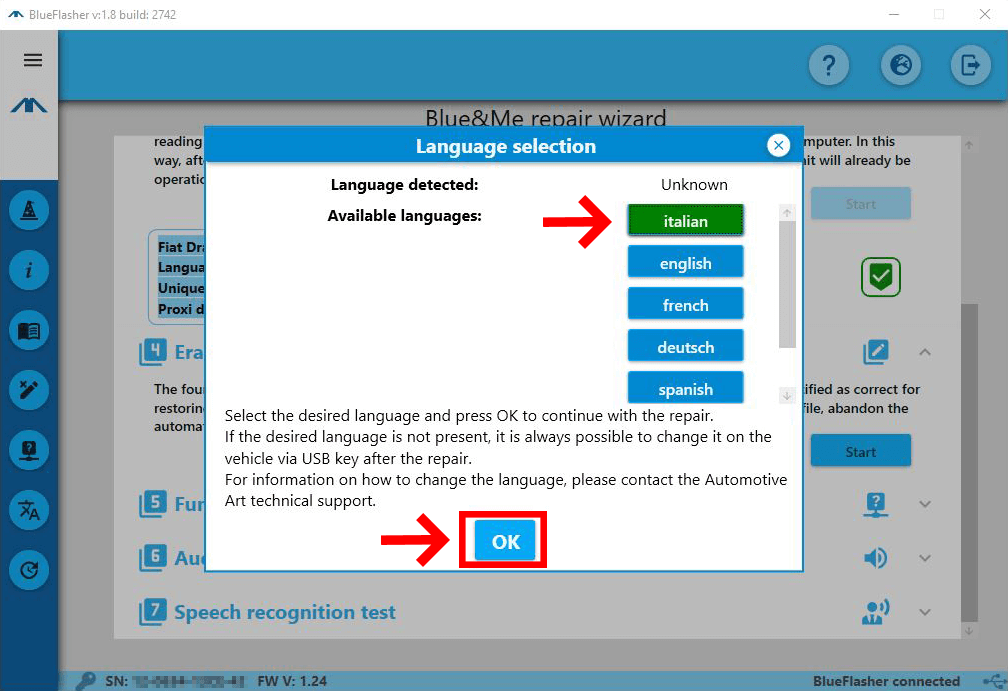
- In the case of Blue&Me Lauberhorn either of 1st or 2nd generation (memory NQ278 / NW140 / K9F1 / K9F12 / K9F56), the desired language must be selected for the voice of the Blue&Me system. (Left image)
- In the case of Blue&Me Chrysler (NW190 memory), the chassis number of the vehicle on which you intend to mount the Blue&Me must be entered. The system language can be selected directly from the vehicle.
During the erase procedure it is possible the program will find some bad memory blocks. In that case it is still possible to continue writing, even if the probability of success of the repair and correct operation on the vehicle are lower.
At the end of the procedure (Image on the right) it is possible to proceed with the final functionality test.
7
Final functionality test
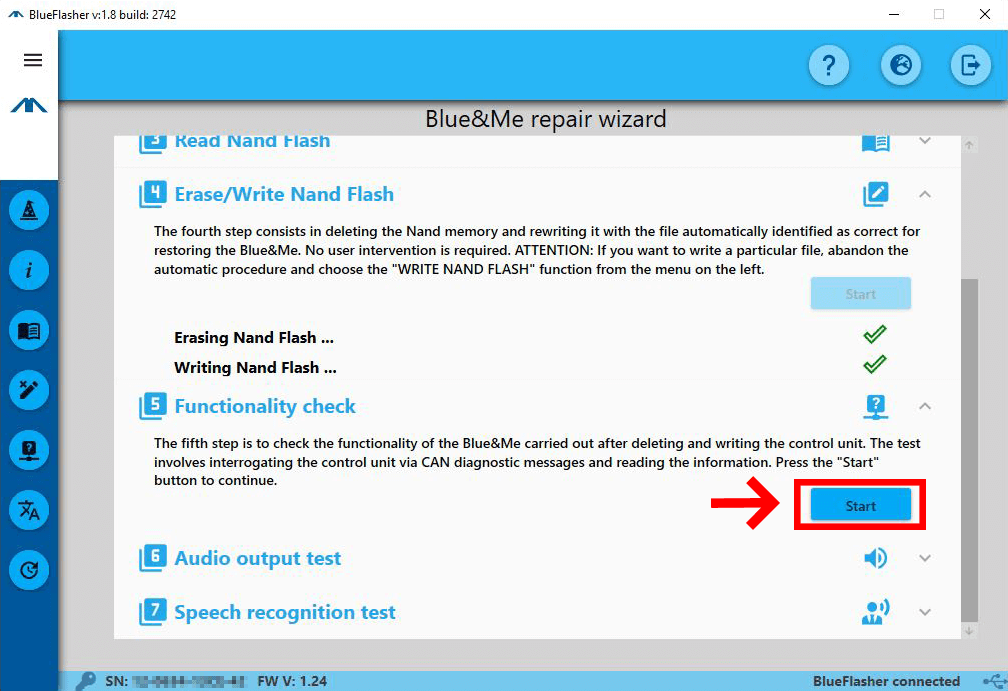
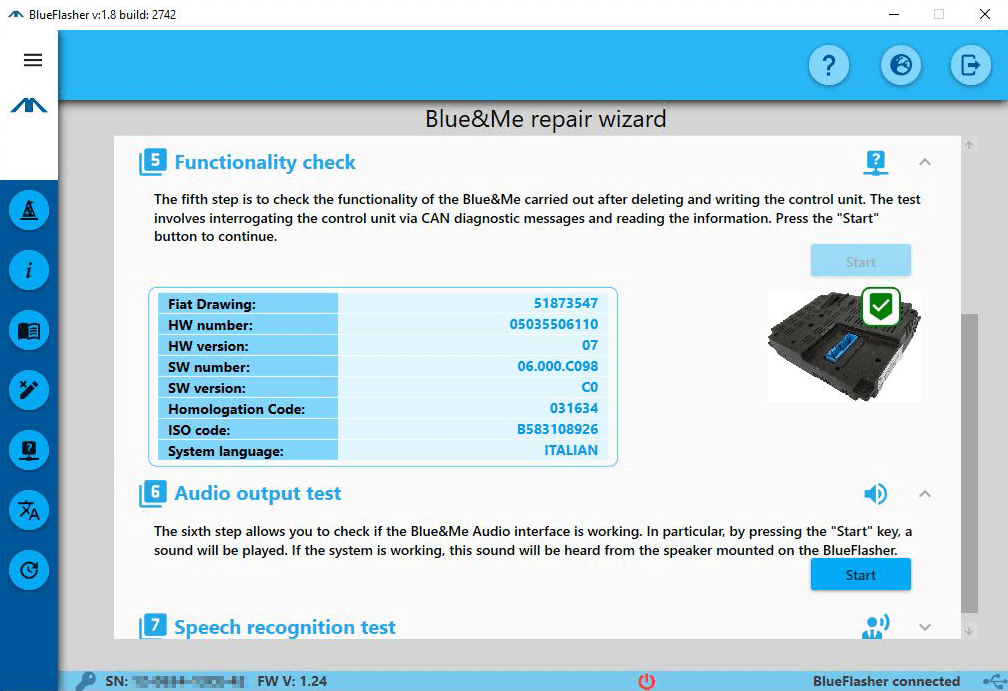
Click on the "Start" button to start the functionality test (Left image). If the repair has been completed successfully, you will be able to see a green tick and the information of the control unit (Right image).
If the repair has not worked, there is probably a hardware problem on the Blue&Me control unit. You can always contact Automotive Art technical support for information on how to proceed.
8
Audio test
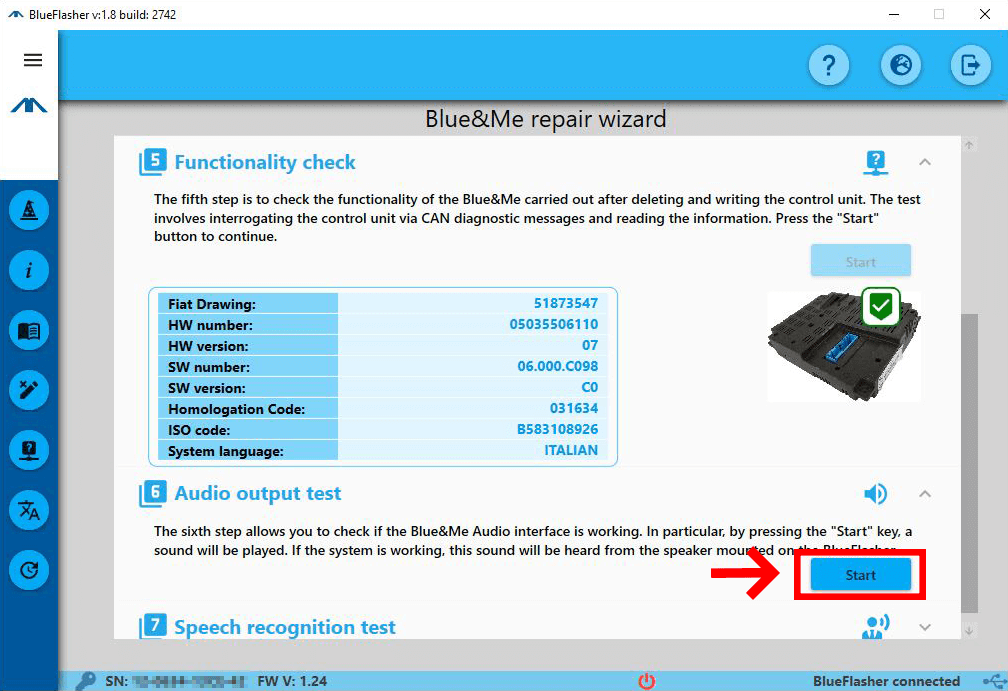
If the functionality test was successful, you can click on the "Start" button to begin the audio test. After a few seconds the Blue&Me module will play a sound.
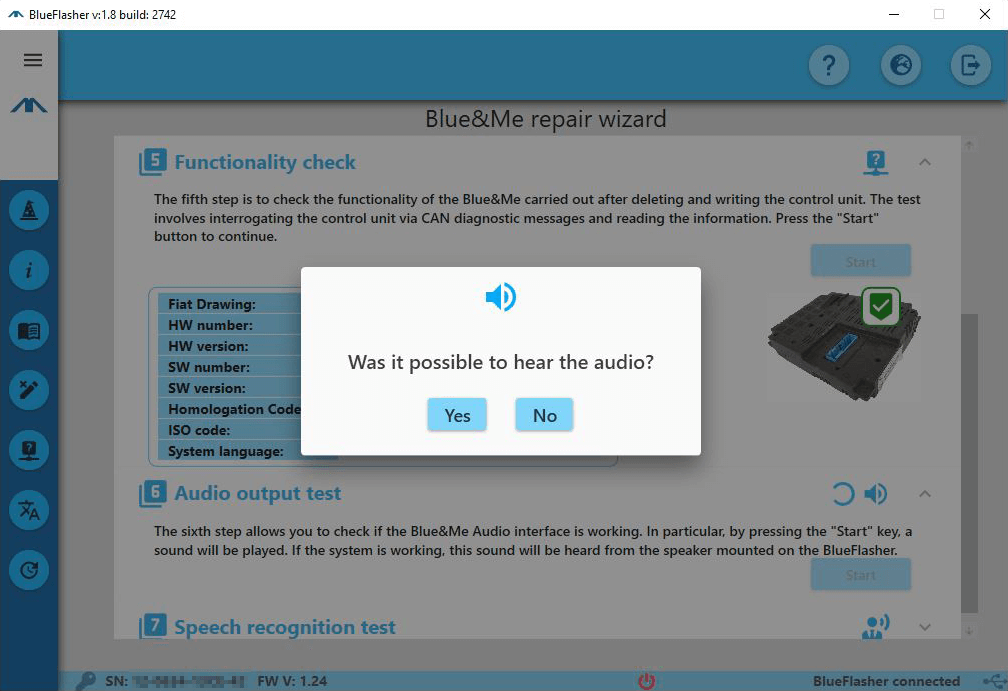
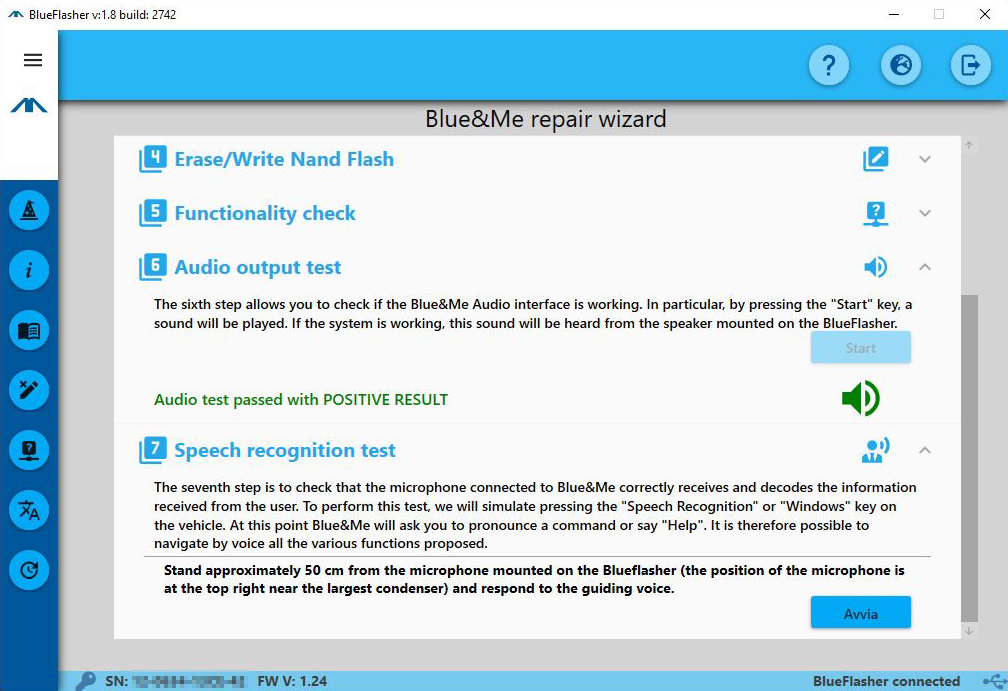
A window will then open asking the user to confirm if it was possible to hear the sound (Left image). If the audio test is completed, you can then proceed to the speech recognition test (Right image).
9
Vocal recognition / Bluetooth test

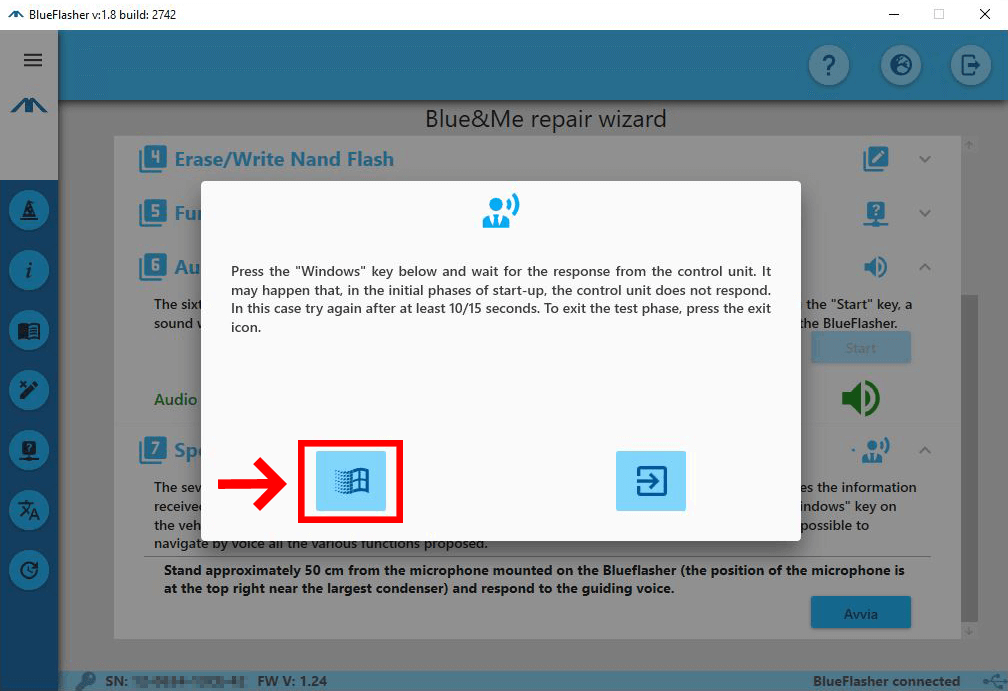
Click on the "Start" button to start the speech recognition test (Left image). A screen will open, wait a few seconds and press the Windows button (Right image). This corresponds to pressing the Windows button from the car's steering wheel controls. After a few seconds, the Blue&Me guide voice should ask the user to pronounce a command (in the language currently present on the Blue&Me).
It is now possible to navigate in all the Blue & Me functions using voice commands by speaking into the microphone located in the upper right part of Blueflasher. Stand approximately 50cm from the microphone to allow the microphone to properly capture your voice. To test the Bluetooth functionality navigate to the required menu with voice commands and pair a phone.
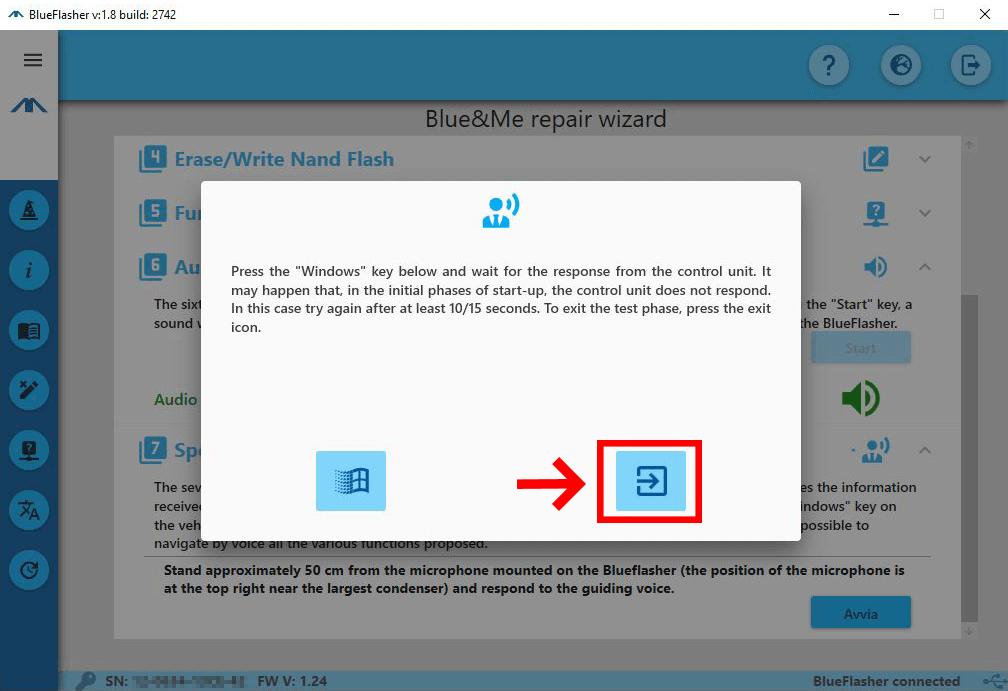
Once satisfied with the test, you can exit the window by pressing the exit button shown in the image above.