1
Connect a FAT32 formatted USB stick to the BlueFlasher port
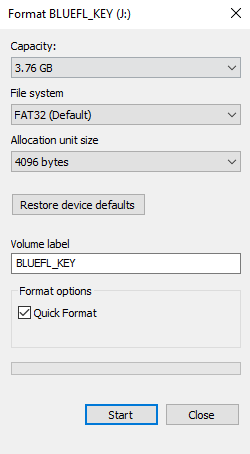
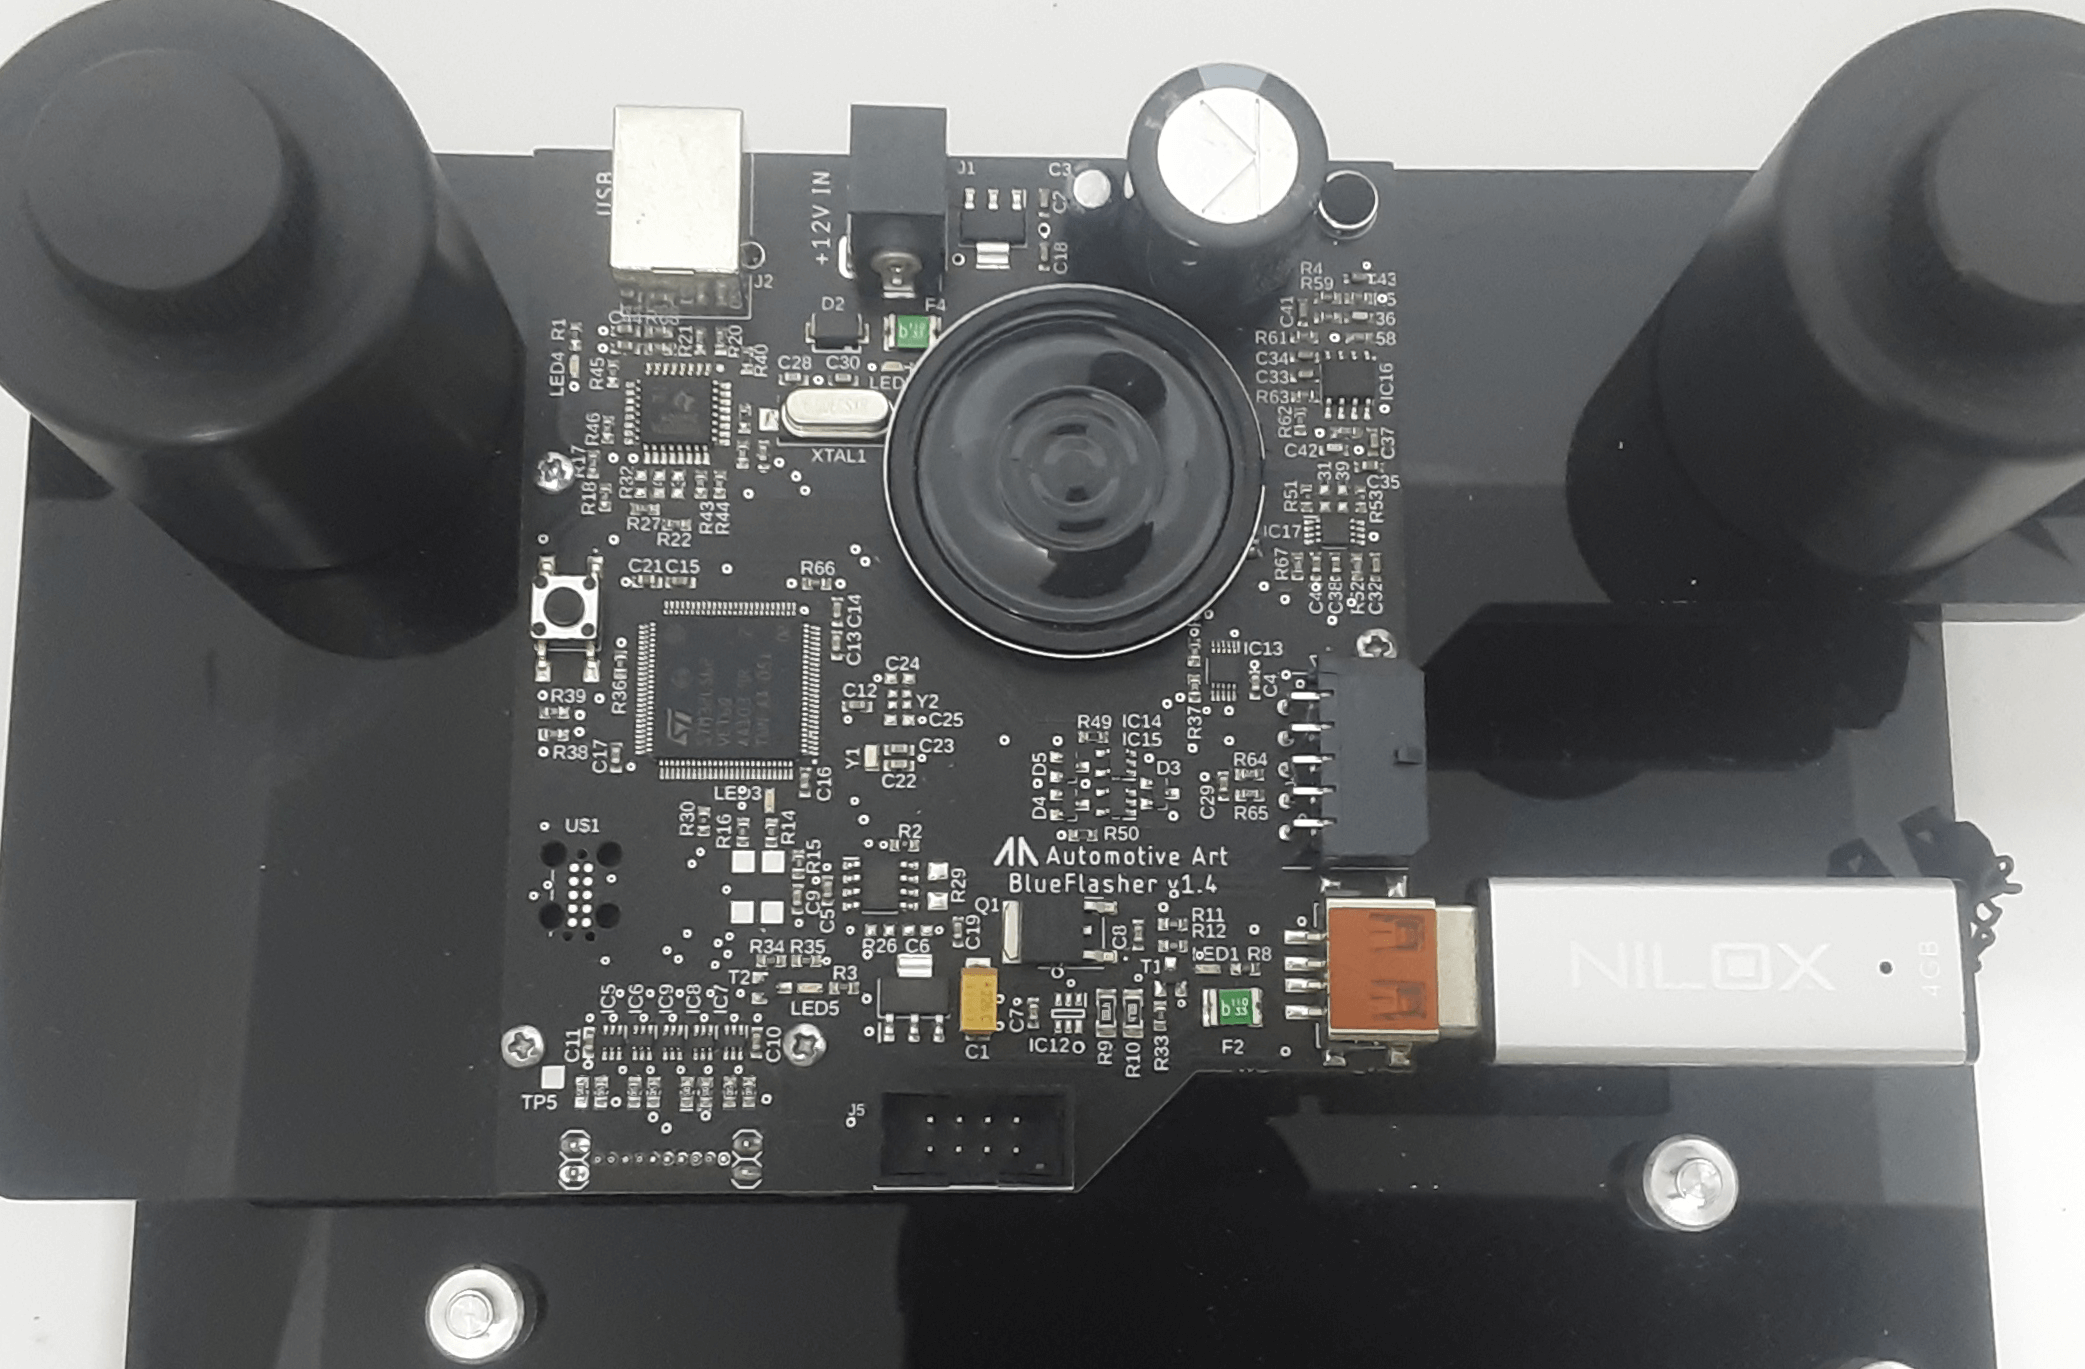
Format a USB stick with a capacity of at least 128 megaBytes in FAT32 format, remembering to rename it "BLUEFL_KEY" (Image on the left). Once formatting is complete, connect the USB stick to the port on the Blueflasher board (Image on the right)
2
Language change function selection
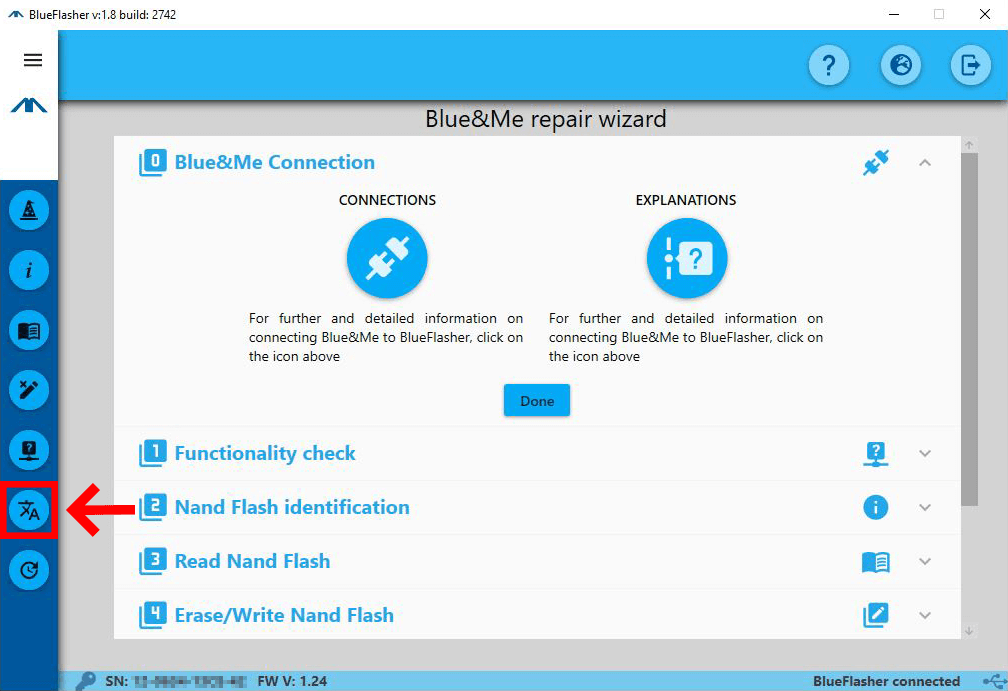
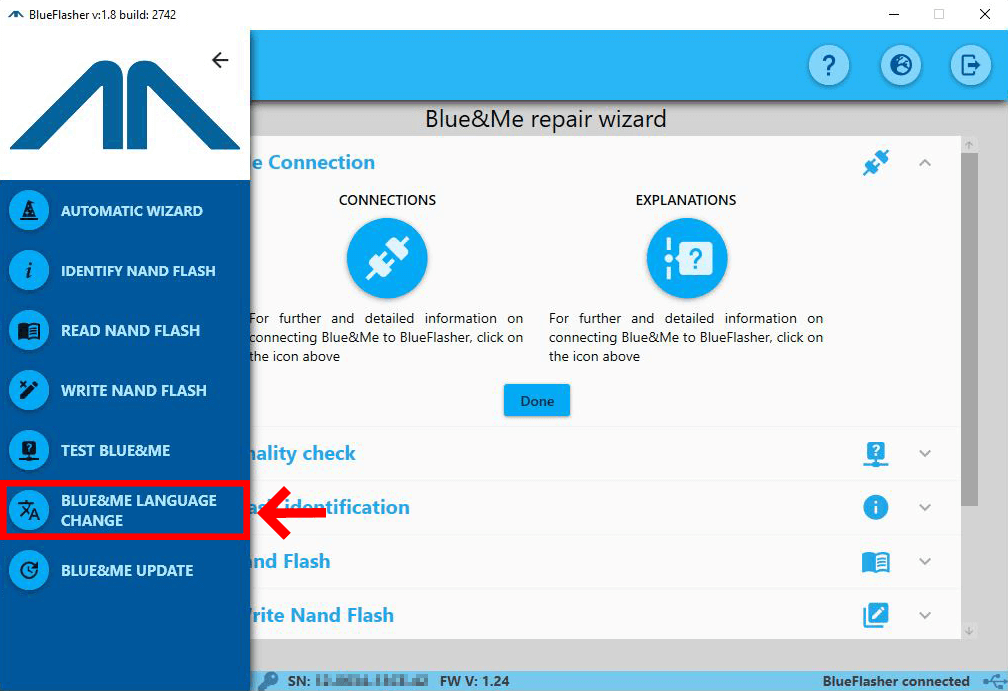
Select the language change procedure from the menu on the left. Make sure that the Blue&Me module is correctly connected to BlueFlasher via the connector cable.
If you are unsure about the connections, you can always check our connection guide for control units of 1st generation and 2nd generation.The J-TAG connection IS NOT necessary for carrying out the test operations.
Make sure the USB key you received with Blueflasher is connected to the USB hub positioned beside the connector cable port. It's possible to use any USB key for this operation, as long as it has at least 128 MegaBytes of space, it is formatted to FAT32 format and has the label name of "BLUEFL_KEY" (to allow the program to recognize it).
3
Start language change
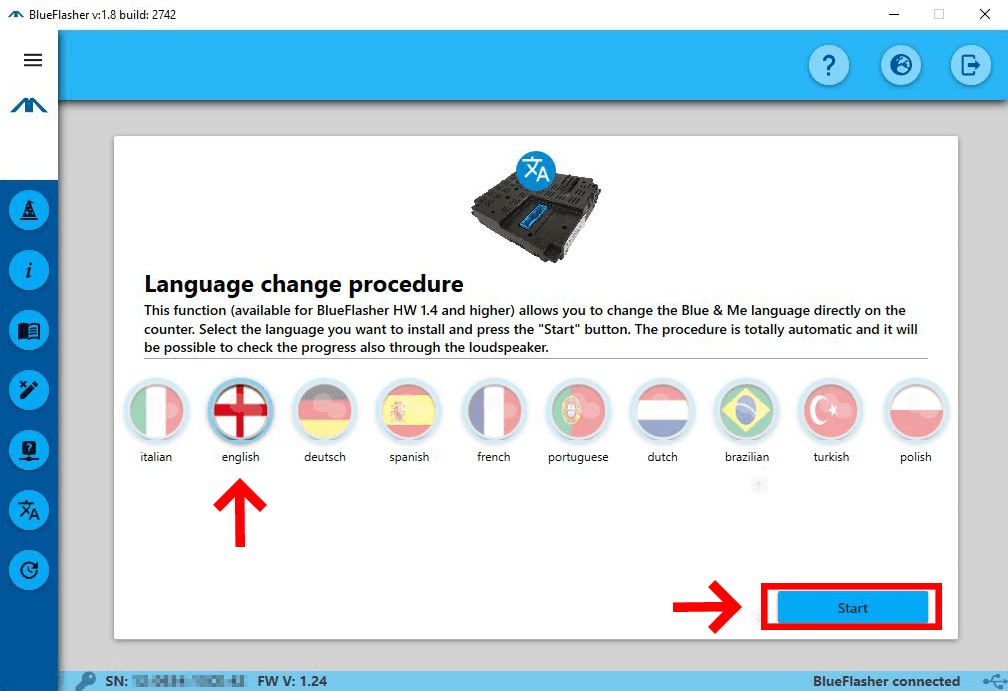
Select the language you want to change the Blue&Me module to from the buttons in the center of the window, then press the "START" button to begin the operation.
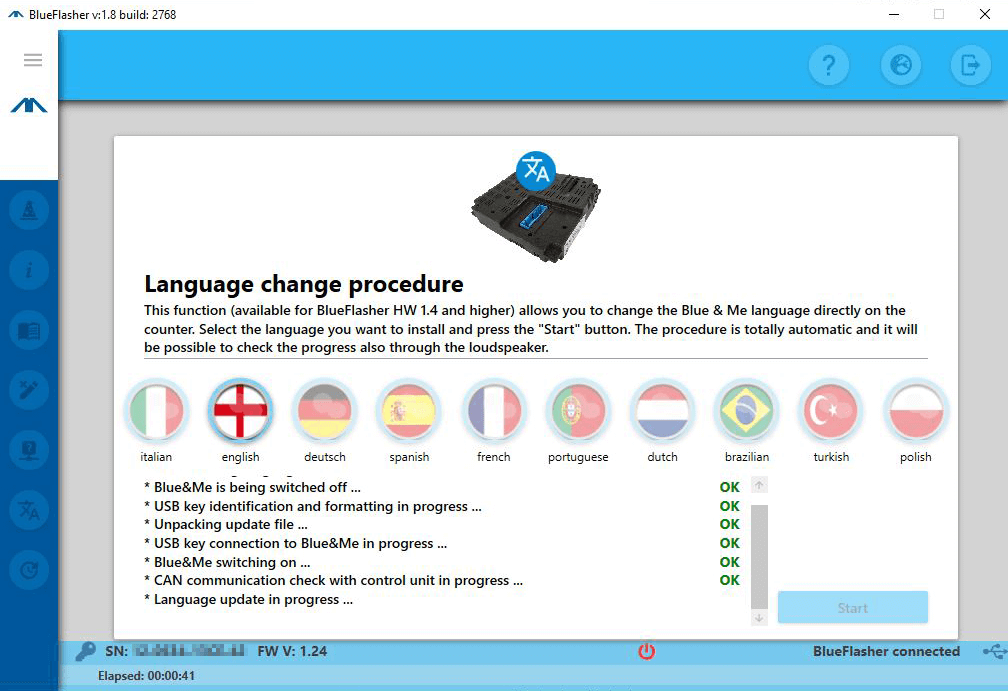
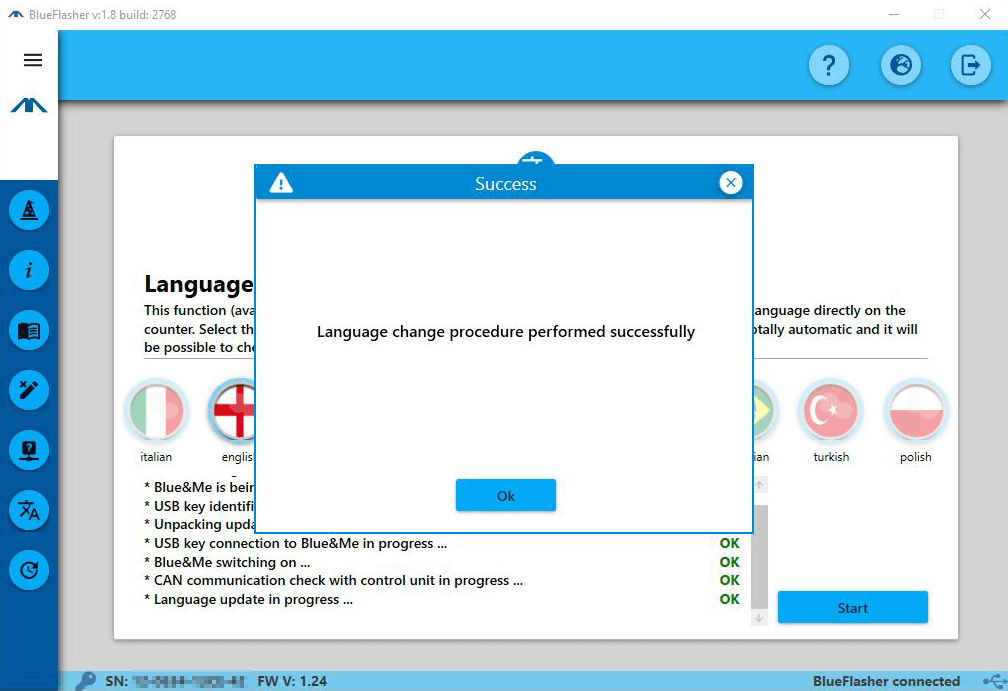
When the program reaches the "Language update in progress" step (Image on the left) it will be possible to hear the Blue&Me guide voice say "Update started" in the language currently present on the module. At the end of the operation, you will hear "Update completed" in the language selected by the user. The program will then notify you that the procedure has been completed (Image on the right).